Software tools I love - Part 3
This is part 3 in my series where I document my process for going from a brand new computer to one that has the basic set of tools I want present to feel productive.
See part 1 and part 2 to recap the process we have gone through so far.
So far we have:
- Installed The latest Windows 10 Insider Build.
- Installed Windows Terminal.
- Installed the Cascadia Code font.
- Installed Visual Studio Code.
- Installed Git.
- Installed the Visual Studio Build Tools 2019.
- Configured Windows Terminal to have profiles for building both native and managed code.
- Verified we can build simple C and C# programs from the terminal.
Next up: customizing our PowerShell environment.
Making the PowerShell experience more awesome

As my previous blog posts have shown, I am a huge fan of PowerShell and have been since, oh, about 2002 when it was known as project Monad inside of Microsoft.
There are many useful PowerShell modules that can make life on the command-line much more enjoyable. What follows are the customizations I can’t live without and am going to get working right away on the machine we are setting up.
Move to PowerShell Core
When we start PowerShell on our new computer we see a message that looks like this:
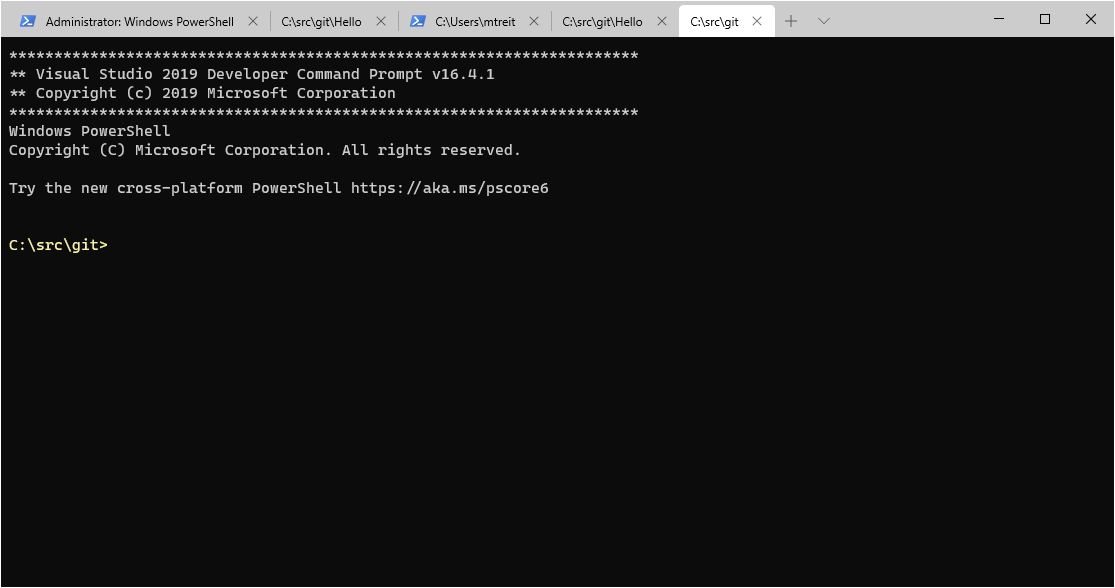
We are going to take the advice of that message suggesting we ‘Try the new cross-platform PowerShell’, which is known as PowerShell Core.
Built on .NET Core, PowerShell Core is the future. Not only is it cross-platform, it gets new features and improvements on a much faster cadence than the traditional Windows PowerShell that ships with Windows. Let’s get it installed and use that instead of the built-in version!
Because we previously installed the .NET Core SDK, we can use a dotnet command to install PowerShell Core. We do that by running the following:
dotnet tool install --global PowerShellOnce it is installed, we use pwsh instead of PowerShell to launch our command-line environment.
I also replace PowerShell with pwsh in the wrapper scripts we created in the previous post; now when I launch one of my development profiles for Windows Terminal we will get a PowerShell Core environment.
PSColors
I use the PSColors module to make things more visually pleasing in PowerShell. Let’s look at how to get it installed.
Because we have a brand-new machine, we need to run a few commands to allow installing the module. We execute the following:
Set-PSRepository -Name PSGallery -InstallationPolicy Trusted
Set-ExecutionPolicy Unrestricted
We can now install the PSColors module:
Install-Module PSColors -Scope CurrentUser -AllowClobberNow we will add importing the module into our session by updating our $profile script. First we open $profile in our editor:
code $profileThen we add this line to the profile and save it:
Import-Module PSColorsNow we should get nice, colorized output on the command-line.
I also make a few tweaks to the colorization format file used by PSColors. The details for doing that can be found in a previous blog post I did talking about PSColors.
A few indispensable PowerShell functions
I have a few customs functions I just can’t live without. In particular, gt to go to the folder location for a specific file path is one that I use dozens of times per day. Also, running utc to get the local-time to UTC-time conversions quickly is another one I use constantly. So, before we move on I will definitely be adding the following small functions to my $profile:
function g {[guid]::NewGuid() | %{$_.Guid}}

function gt
{
    if ($args[0])
    {
        Push-Location (Split-Path $args[0])
    }
}

function spop
{
    while ((Get-Location -stack).Count -gt 0)
    {
        popd
    }
}

function Get-Utc
{
    Param(
        [Parameter(Mandatory=$False, Position=0, ValueFromPipeline=$True, ValueFromPipelinebyPropertyName=$True)]
        [string[]]$Date
    )

    Process
    {
        if (!$Date)
        {
            $Date = [DateTime]::Now
        }

        $Date | %{
            $dt = ([DateTime]$_).ToString("M/d/yyyy")
            (0..23) | %{([DateTime] "$dt $($_):00")} | %{
                New-Object PSObject -Property @{
                    UTC = $_.ToString("(ddd) M/d/yyyy HH:mm")
                    Local = $_.ToLocalTime().ToString("(ddd) M/d/yyyy HH:mm")
                }
            }
        }

        "$([Environment]::NewLine)Current UTC: $([DateTime]::UtcNow)"
    }
}

function InWindowsTerminal {
    if ($env:WT_SESSION) {
        return $true
    }

    return $false
}
I’ve covered most of these in some previous posts…see here and here.
The InWindowsTerminal function is useful to determine if you can write things like emoji into your script output and expect it to render.
Installing the Windows Subsystem for Linux (WSL)
With the work we have done so far we have our OS and a good editor installed; we can clone git repositories, build native and managed code and we have an aesthetically pleasing PowerShell experience using PowerShell Core and PSColors.
We are ready to move into building and installing some really useful command-line tools from the open-source community. In fact, we are going to build some of them from source, as alluded to in the previous post where we got our command-line build tools installed and working.
Many open-source products have their roots in the Linux operating system and some of the installation routines are really geared towards Linux. In order to ensure we can seamlessly use either native Windows tools or native Linux tools, we will install the awesome Windows Subsystem for Linux.
We start by running the following from our PowerShell Core prompt:
Enable-WindowsOptionalFeature -Online -FeatureName Microsoft-Windows-Subsystem-LinuxOnce this completes (a reboot may be required) we can install and configure out desired Linux distribution. In our case we will install Ubuntu:
curl.exe -L -o ubuntu-1804.appx https://aka.ms/wsl-ubuntu-1804
Add-AppxPackage .\ubuntu-1804.appx
(Since we are running on a very recent Windows 10 Insider build, curl.exe should be present as it is now a built-in command.)
After the distro is added, we can install it by clicking the Ubuntu link on our Start Menu. After that installs we can make sure everything is up to date with:
sudo apt update && sudo apt upgradeThis will take a while, but once it completes we will have a working Ubuntu environment that is ready to use.
Installing the .NET Core SDK on WSL
We want to be able to install things like PowerShell Core and potentially build .NET applications in our WSL environment, so we will start by installing the .NET Core SDK into our Ubuntu WSL environment.
We are going to follow the instructions from here.
wget -q https://packages.microsoft.com/config/ubuntu/18.04/packages-microsoft-prod.deb -O packages-microsoft-prod.deb
sudo dpkg -i packages-microsoft-prod.deb
sudo add-apt-repository universe
sudo apt-get update
sudo apt-get install apt-transport-https
sudo apt-get update
This ensures we have the Microsoft key registered and dependencies installed.
Then we can simply install the SDK:
sudo apt-get install dotnet-sdk-3.1Once that completes, we can verify the SDK is installed:
mtreit@mtreit3:~$ dotnet --info
.NET Core SDK (reflecting any global.json):
 Version:   3.1.100
 Commit:    cd82f021f4

Runtime Environment:
 OS Name:     ubuntu
 OS Version:  18.04
 OS Platform: Linux
 RID:         ubuntu.18.04-x64
 Base Path:   /usr/share/dotnet/sdk/3.1.100/

Host (useful for support):
  Version: 3.1.0
  Commit:  157910edee

.NET Core SDKs installed:
  3.1.100 [/usr/share/dotnet/sdk]

.NET Core runtimes installed:
  Microsoft.AspNetCore.App 3.1.0 [/usr/share/dotnet/shared/Microsoft.AspNetCore.App]
  Microsoft.NETCore.App 3.1.0 [/usr/share/dotnet/shared/Microsoft.NETCore.App]

To install additional .NET Core runtimes or SDKs:
  https://aka.ms/dotnet-download
https://docs.microsoft.com/en-us/dotnet/core/install/linux-package-manager-ubuntu-1804
Installing PowerShell Core on WSL
Finally, we can get PowerShell Core installed. Since we have installed the .NET SDK, this is simply a matter of executing the following:
dotnet tool install --global PowerShellNow when we open a WSL Bash prompt from our Windows Terminal dropdown, we can run pwsh to start a PowerShell Core prompt and use the PowerShell commands we know and love.
I added the same utility functions to my WSL $profile that we saw earlier added to the $profile on Windows. I did omit importing the PSColors module since it seems to have Windows-specific dependencies.
Wrapping up for now
We’ve made more great progress getting our development workstation setup for maximum productivity!
We installed PowerShell Core and the PSColors module for a better experience on the command-line. We updated our PowerShell $profile to include some useful utility functions, with the idea that we will add many more such functions and aliases in the days to come. We installed Windows Subsystem for Linux (WSL) running Ubuntu 18.04. We got the .NET Core SDK installed in our Linux environment. We got PowerShell Core installed in our Linux environment.
Next time I plan on showing how we can install a few of my favorite command-line tools that happen to be written in the fascinating Rust programming language. To do that, we will install the Rust development environment and build the tools ourselves from source.