Software tools I love - Part 5
This is part 5 in my series where I document my process for going from a brand new computer to one that has the basic set of tools I want present to feel productive.
For previous installements, see:
Part 1, Part 2, Part 3, Part 4
So far we have:
- Installed The latest Windows 10 Insider Build.
- Installed Windows Terminal.
- Installed the Cascadia Code font.
- Installed Visual Studio Code.
- Installed Git.
- Installed the Visual Studio Build Tools 2019.
- Configured Windows Terminal to have profiles for building both native and managed code.
- Verified we can build simple C and C# programs from the terminal.
- Installed PowerShell Core on Windows.
- Installed the PSColors PowerShell module
- Started building a set of helper functions in our PowerShell $profile
- Installed the Windows Subsystem for Linux (WSL)
- Installed and updated Ubuntu 18.04 on WSL.
- Installed the .NET Core SDK on our WSL environment.
- Installed PowerShell Core on WSL.
- Installed the Rust toolchain and Cargo so we can build and install projects written in Rust.
- Installed ripgrep to allow fast searching for text in files.
- Installed fastmod to perform bulk search and replace / refactorings from the terminal.
- Installed Starship to get an awesome looking terminal prompt.
Blogging with GitHub Pages
In today’s post we are going to look at what we need to do to set up our new machine for writing blog posts using GitHub Pages.
Installing a Ruby development environment
![]()
I’m not a Ruby programmer, however we will need a Ruby development environment to best take advantage of how GitHub supports acting as a blogging platform.
GitHub pages allows you to write blog posts by simply commiting markdown or HTML files to your GitHub repo at username.github.io. GitHub Pages integrates tightly with the static website generating tool Jekyll. The markdown files you author are converted to static HTML by Jekyll, and then published as blog posts by GitHub Pages when the content is commited and pushed to the remote repo.
While it is not necessary to use Jekyll to generate your GitHub Pages blog, it removes a lot of manual work and is therefore the simplest way to get things done with minimal fuss. You still have complete control over customizing the resulting site, so even if you want to hand-code your own static HTML pages and eschew using markdown, you can.
Jekyll is written using the Ruby programming language, so we will need to start by installing the Ruby toolchain to allow us to run a local Jekyll server. This allows previewing what our blog looks like before publishing it.
For a detailed tutorial on setting up a Jekyll blog, please see this page on github.com, which goes into great detail.
For the purpose of this post, we already have an existing blog on github.io, but we need to get the necessary tools installed on the new computer we have been setting up. In other words, this is the cliff-notes version.
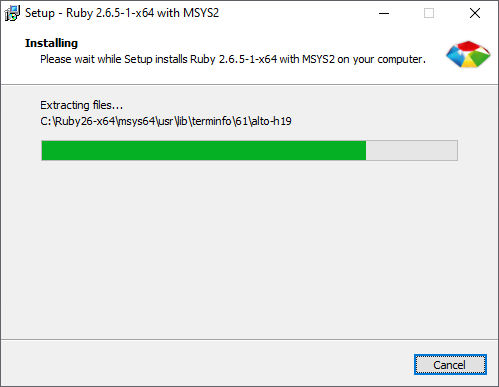
To install the Ruby development tools on Windows, we follow the instructions here, which direct us to rubyinstaller.org and in particular (as of this writing) the 2.6.5.-1-x64 setup package with devkit.
This is a standard Windows setup program, so we simple execute it and wait a few minutes for the installation to complete.
Configuring a Ruby terminal environment
Once the install finishes there will be a ‘Start Command Prompt with Ruby’ shortcut on the Start Menu. However, that will launch the Ruby environment running under the old, ugly and not-very-fun conhost.exe. As early adopters of the new and vastly more beautiful and exciting Windows Terminal, we will set up a separate terminal profile to use for blogging.
Step 1: create a wrapper script to execute the Ruby initialization script and change to a specified folder. We do this by saving the following under %userprofile%\tools\rubyprompt.cmd:
@echo off
call C:\Ruby26-x64\bin\setrbvars.cmd
cd /d "%1"
pwsh
(Obviously replace the path to setrbvars.cmd to the location to which you installed Ruby.)
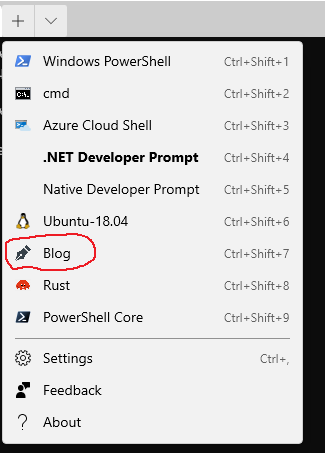
Now we can create a Windows Terminal profile that will invoke the above script.
In Windows Terminal we press ctrl+, (control plus the comma character) to open the settings editor, and add a new section like this:
{
    "guid": "{9a544494-e45e-46a3-af38-2683f77c65f5}",
    "hidden": false,
    "name": "Blog",
    "commandline" : "cmd.exe /k \"%userprofile%\\tools\\rubyprompt.cmd c:\\src\\github\\Treit\\treit.github.io\"",
    "fontFace": "Cascadia Mono PL",
    "colorScheme" : "Campbell",
    "icon" : "%userprofile%\\Pictures\\fountainpen1.png"
}
As usual, be sure to generate a unique Guid for the new profile.
Now when we want to write blog posts we can simply open the Windows Terminal profile called ‘Blog’ and it will initialize our environment appropriately.
Customzing our terminal color scheme for blogging
We set the ‘colorScheme’ setting to the popular ‘Campbell’ setting that comes with Windows Terminal, but there are endless possibilities for customizing the color scheme to match our own aesthetic tastes. I like my blogging environment to stand out from my other coding environments, so let’s come up with a different scheme.
We could write out own, but luckily there exists a huge assortment of existing, popular terminal color schemes available on github. These can be found at the iTerm2-Color-Schemes repo. Warning: visiting this site could lead to many hours of wasted productivity as you try out scheme after scheme in your terminal!
Let’s say we like the look of the Belafonte Day color scheme and want to try that out for our blogging terminal. We simply download the json and add it to the ‘schemes’ section of our terminal settings file:
"schemes": [
    {
        "name": "Belafonte Day",
        "black": "#20111b",
        "red": "#be100e",
        "green": "#858162",
        "yellow": "#eaa549",
        "blue": "#426a79",
        "purple": "#97522c",
        "cyan": "#989a9c",
        "white": "#968c83",
        "brightBlack": "#5e5252",
        "brightRed": "#be100e",
        "brightGreen": "#858162",
        "brightYellow": "#eaa549",
        "brightBlue": "#426a79",
        "brightPurple": "#97522c",
        "brightCyan": "#989a9c",
        "brightWhite": "#d5ccba",
        "background": "#d5ccba",
        "foreground": "#45373c"
    }
],
…and then set that as the colorScheme settings for our Blog profile:
{
"guid": "{9a544494-e45e-46a3-af38-2683f77c65f5}",
"hidden": false,
"name": "Blog",
"commandline" : "cmd.exe /k \"%userprofile%\\tools\\rubyprompt.cmd c:\\src\\github\\Treit\\treit.github.io\"",
"fontFace": "Cascadia Mono PL",
"colorScheme" : "Belafonte Day",
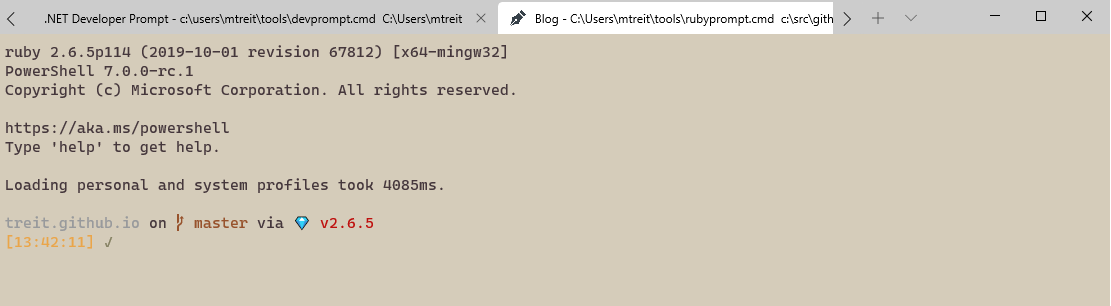
"icon" : "%userprofile%\\Pictures\\fountainpen1.png"
}The resulting prompt will end up looking something like this:
Installing Jekyll and Bundler
Ok, we have a Ruby environment installed and we have a nice Windows Terminal profile that we will use for blogging, complete with a new color scheme.
Next we will need to install Jekyll and Bundler. Jekyll, as we have mentioned, is the static site generator that will generate the final HTMl for our blog, and Bundler is a popular Ruby package manager that ensures the correct versions of Ruby packages (called ‘gems’) are installed.
From our Blog terminal that we just configued, we simply run:
gem install jekyll bundlerOnce the install completes we need to run bundler to install any missing gems that we need, as specified in the gemfile for our blog. From the root folder of our blog, which we have already cloned from GitHub, we just run:
bundle installOnce the install command finishes, we’re done! Now we can start our local blog server and view our local blog content as we work on new posts, by simply running:
bundle exec jekyll serveOf course the above assumes you already have a working Jekyll blog. If you have never set up a blog using Jekyll, the documentation has some great tutorials to get you started.
Conclusion
We’ve completed another step on setting up a development workstation from scratch, this time installing the tools needed to enjoy authoring blog posts using GitHub Pages. At this point we are pretty close to having all of the core tools and settings configured to feel productive and happy! However, I think I probably have at least another couple of tools I can’t live without that I will share in a final upcoming post or two.
Happy new year!